Matrix Themes come with an Advanced Style Editor that enables you to customize any color on your website and configure the main template structure, including navigation, fonts, and much more.
This page includes a step-by-step tutorial on how to reinstall the style editor on your site in case you accidentally removed it or need to reset the entire website's style.

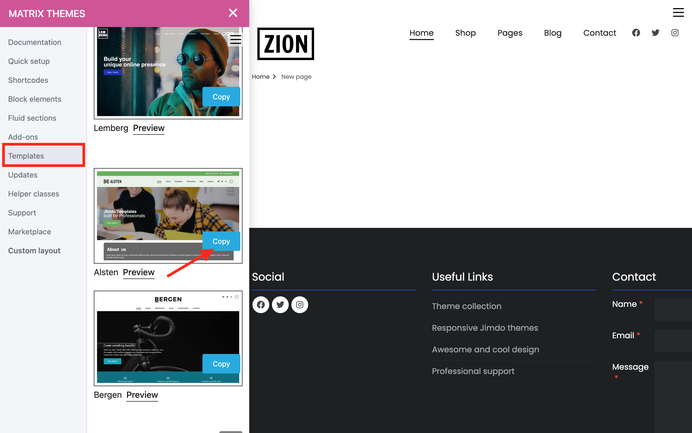
In the Matrix themes admin menu, navigate to "Design Library" (or "Templates" in previous theme versions). Choose the design for your website by clicking the Copy button next to the selected design.

Add a module 'Columns' to your footer with only one column(!). Inside the 'Columns' add the module 'Tables', Click on 'Edit HTML' button and replace the existing code with the one you copied and at the end click the save button.
Step 02
Opening agan the "Design Library" section, locate the "JS Code Editor" and copy it. Paste the code inside the "Widget/HTML" module just below the "Tables" you added to your website. Ensure that both the Tables and Widget/HTML modules are placed within the same column module.
In summary, ensure that you have a 'Columns' module in the Footer section with just one column. Inside this column, place two distinct elements: a 'Tables' module with a style editor, and a 'Widget/HTML' module containing JavaScript code.
You can change the template of your website by selecting a pre-made design from the 'Templates' section in the Matrix Themes admin menu.
1. Choose the design you'd like to use for your website by clicking the copy button
The tutorial above on installing the Style Editor is very clear. In case of any errors made in Tables or Widget/HTML, you can easily replace the original source file from the Quick Setup or Templates sections
Don't forget about theme updates
Please remember to check for theme updates, available in the 'Updates' section. Sometimes, errors may occur or certain features might not work as expected due to missing the latest updates (CSS and JS).
Tips & Suggestions
Please refrain from using any other Jimdo elements inside the Style Editor. As a draggable area, you will be able to move any element within this area. You should only have two elements in the Style Editor: Tables and Widget/HTML modules
Sometimes one of the elements in the Style Editor may end up in the clipboard area and cannot be moved back using draggable options.
There are 2 options to fix it.
Option 1:
Inside the Style Editor, add a module called 'Spacing' with a height of at least 150px. After that, you'll be able to move the tables to the Style Editor area.
Option 2:
In the second option you can also move it to the content section
Clicking the "Edit HTML" button you copy the source code
Next, add a new 'Tables' module directly inside the Style Editor by pasting the source code into the new element


