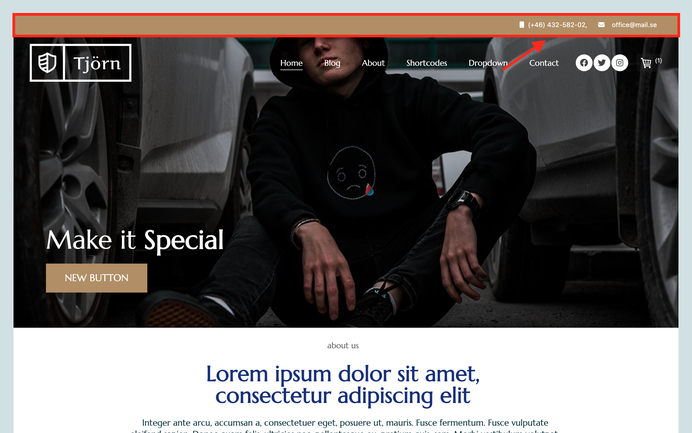
What is a top header section
The top header section in Matrix themes is the area displayed at the top of the header, typically featuring contact information such as a phone number and email address.
How to edit
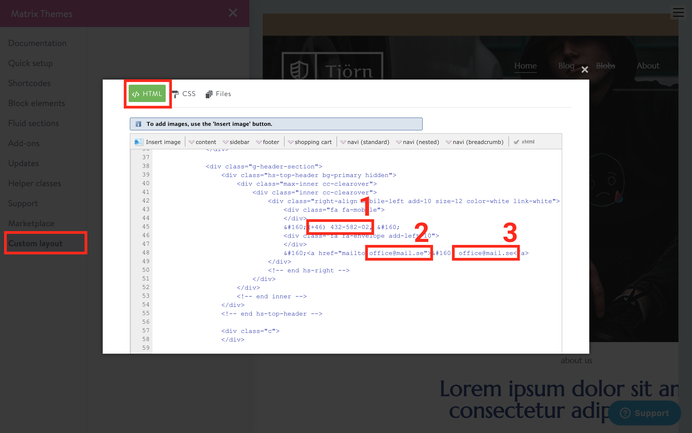
This is the only template area that can be edited directly in HTML.
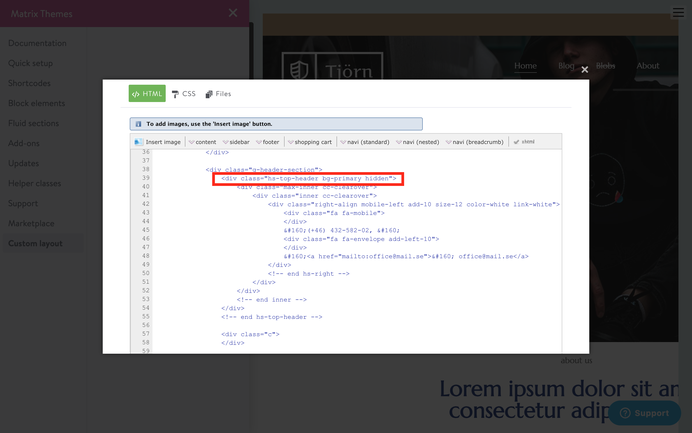
To make changes, open the Matrix Themes admin menu, select 'Custom Layout,' then go to the HTML tab. Locate the editable three lines, as shown in the screenshot, and replace them with your own information. Finally, click the save button at the bottom of the page to confirm the changes.
How to change the text color
Remove the classes color-white or link-white if you need to display the dark text color.
(The alternative classes are color-dark and link-dark. You can use the inline styles here to add any other color)
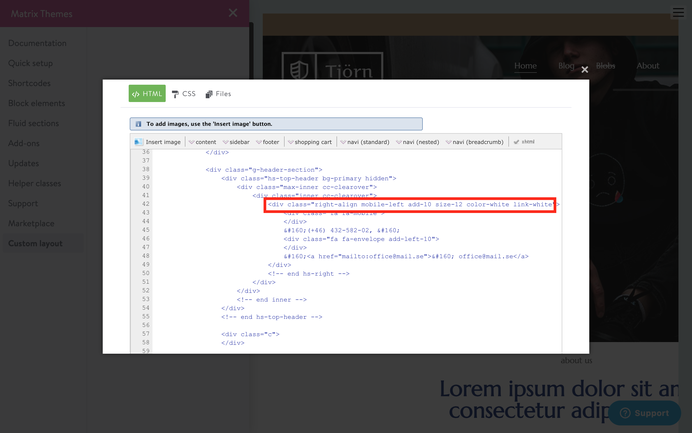
How to activate
Not all templates display the top header section by default.
To activate it, you have two options:
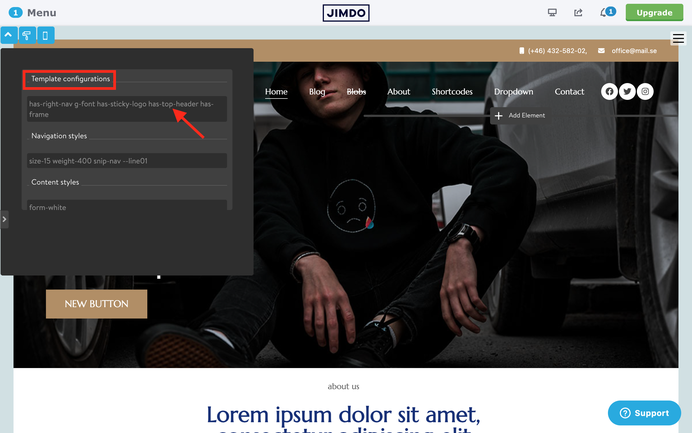
1. Open the Style Editor, navigate to Template Configurations, and add the class 'has-top-header'.
2. Go to Custom Layout > HTML tab, find the following line as shown in the screenshot below, and remove the 'hidden' class. Click the save button at the bottom of the page to confirm the changes.
Troubleshooting
One of the most common mistakes occurs when editing the HTML, leading the system to automatically correct your code by adding a div or closing tag in the wrong position. As a result, the entire template might appear with different and unexpected styles.
To reset back to the default HTML:
- Go to the 'Updates' section.
- Choose 'Source files' by selecting a multipurpose or multilingual template.
- Then, select 'HTML.'
- Copy the code provided and paste it onto your website.
- Click the save button at the bottom of the page to confirm the changes
Quick links

| bg-primary | |
| bg-primary-light | |
| bg-primary-dark | |
| bg-secondary | |
| bg-secondary-dark |
| body | |
| top-header | |
| header | |
| content |
| background | |
| text color | |
| link color | |
| horizontal line |
| style 1 | |
| style 2 | |
| style 3 | |
| text color |
| social icons | |
| navigation color | |
| subnav background |
| background color | |
| navigation color |
| Template configurations |
| has-center-nav has-large-header g-font m-text-16 |
| Navigation styles |
| size-16 weight-400 snip-nav has-icon-1 |
| Content styles |
| form-white |
| Footer styles |
| o-form color-white |
|
Typography |
| Heading H1 |
| weight-600 |
| Heading H2 |
| weight-600 |
| Heading H3 |
| weight-500 |
| Buttons |
| weight-500 |
| Advanced settings |
| Animations |
| Custom CSS |
|
#cc-inner .my-class { background: #000; }
#cc-inner .bg-intro { background-image: linear-gradient(to bottom, var(--bg-primary-dark) 5%, rgba(0, 0, 0, 0) 30%, transparent 70%, var(--bg-primary-dark) 95%), radial-gradient(circle farthest-corner at 50% 50%, var(--bg-primary), transparent 70%); min-height:70vh; }
|
Note: All changes made here will be applied to your entire website.